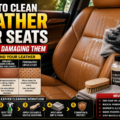
How to Clean Leather Car Seats Without Damaging Them
Leather car seats bring luxury, comfort, and high resale value to any vehicle. However, leather is a organic material—unlike synthetic vinyl or cloth upholstery, it possesses natural pores, oils, and moisture levels that require specific maintenance.
Improper cleaning methods like using harsh household chemicals, abrasive scrub brushes, or soaking the leather in liquid can strip factory protective coatings, cause premature cracking, or leave dark water stains.
Whether you want to perform routine maintenance or tackle stubborn grime, learning how to clean leather car seats safely preserves their supple texture and factory finish.
This guide covers DIY cleaning steps, safe products, common mistakes to avoid, and when to hire a professional detailer.
Understanding Your Vehicle’s Leather
Before applying any product, you must understand how automotive leather differs from household leather goods (like jackets or boots).
┌───────────────────────────────────────────────────────────────────────────┐
│                    AUTOMOTIVE LEATHER TYPES MAP                           │
├───────────────────┬──────────────────────────┬────────────────────────────┤
│ Leather Type      │ Characteristics          │ Care Requirements          │
├───────────────────┼──────────────────────────┼────────────────────────────┤
│ Top-Coated /      │ Features a clear polymer │ Mild pH-neutral cleaner;   │
│ Pigmented         │ protective topcoat.      │ gentle agitation; wipe dry.│
│ (90%+ of cars)    │ Standard on modern cars. │                            │
├───────────────────┼──────────────────────────┼────────────────────────────┤
│ Aniline / Semi-   │ Minimal protective       │ Requires specialized       │
│ Aniline           │ clear coating; highly    │ low-moisture leather       │
│ (High-End Luxury) │ absorbent and delicate.  │ cleaners & conditioners.   │
├───────────────────┼──────────────────────────┼────────────────────────────┤
│ Perforated        │ Features micro-holes for │ Low liquid volumes; prevent│
│ Upholstery        │ heated/ventilated seats. │ moisture from entering     │
│                   │                          │ cushion foam underneath.   │
└───────────────────┴──────────────────────────┴────────────────────────────┘
Most modern vehicles use top-coated pigmented leather. This clear protective layer shields the dye underneath from UV rays and wear. Your primary goal when cleaning is to lift body oils, dirt, and dust off this top layer without stripping or abrading the coating.
Essential Supplies for DIY Leather Cleaning
Using the right tools prevents accidental scratches or chemical damage.
                  SAFE LEATHER CLEANING TOOLKIT
─────────────────────────────────────────────────────────────────────
MUST-HAVE SUPPLIES:
• pH-Neutral Automotive Leather Cleaner (or mild castile soap mix)
• Soft Horsehair Detailing Brushes (never stiff nylon or brass)
• Ultra-Soft Microfiber Towels (300+ GSM)
• High-Efficiency Vacuum Cleaner with a soft brush attachment
• High-Quality Leather Conditioner (UV-inhibiting formula)

THINGS TO NEVER USE:
× Dish soap, laundry detergent, or multi-surface cleaners
× Bleach, ammonia, or hydrogen peroxide
× Isopropyl alcohol or hand sanitizer
× Magic Erasers (melamine foam acts like fine sandpaper)
× Stiff-bristled scrub brushes or steel wool
─────────────────────────────────────────────────────────────────────
Step-by-Step: How to Clean Leather Car Seats Safely
Follow this step-by-step process to safely deep-clean your leather car seats at home.
┌───────────────────────────────────────────────────────────────────────────┐
│                     DIY LEATHER CLEANING WORKFLOW                         │
├───────────────────────────────────────────────────────────────────────────┤
│ Step 1: Vacuum & Clear Loose Debris (Soft brush attachment)              │
│ Step 2: Spot Test Your Leather Cleaner (Inconspicuous area)              │
│ Step 3: Apply Cleaner & Gentle Agitation (Work one section at a time)   │
│ Step 4: Wipe Away Dirt & Foam (Clean, dry microfiber towel)              │
│ Step 5: Condition & Protect (Restore oils & block UV rays)               │
└───────────────────────────────────────────────────────────────────────────┘
Step 1: Vacuum & Clear Loose Debris
Loose sand, dirt particles, and food crumbs act like sandpaper when wiped across leather surfaces.
- Use a vacuum cleaner equipped with a soft horsehair brush attachment.
- Gently spread open seat bolsters and seams to vacuum out hidden grit.
- On perforated seats, use light suction to prevent forcing loose dirt down into the vent holes.
Step 2: Spot Test Your Leather Cleaner
Never skip a spot test when using a new product or home mix.
- Apply a dime-sized amount of cleaner to a small, hidden area (such as the lower back edge of the seat).
- Gently rub with a white microfiber towel and wait 5 minutes.
- Inspect the towel: if you see seat dye transferring to the microfiber, stop immediately. Your clear topcoat may be compromised, and the product is too aggressive.
Step 3: Apply Cleaner and Gently Agitate
Working in small sections (one seat bottom or backrest at a time) keeps the cleaner from drying prematurely on the surface.
                      CLEANER APPLICATION METHOD
─────────────────────────────────────────────────────────────────────
FOR SOLID LEATHER      : Spray the cleaner lightly onto a soft brush or
                         towel, or spray directly on the panel. Agitate
                         in gentle circular motions to build a light lather.

FOR PERFORATED LEATHER : NEVER spray cleaner directly onto the seat.
                         Spray cleaner onto your horsehair brush bristles,
                         work it into a light foam, then apply the foam to
                         prevent liquid from pooling in the perforations.
─────────────────────────────────────────────────────────────────────
Agitate gently. Let the chemical surfactants in your pH-neutral cleaner lift the body oils and grime—do not scrub hard.
Step 4: Wipe Away Dirt and Foam
- Using a clean, dry microfiber towel, wipe away the emulsified dirt and cleanser immediately.
- Use a second dry microfiber towel to buff the surface completely dry.
- Ensure no liquid remains trapped in seat seams or perforations.
Step 5: Condition and Protect
Cleaning removes dirt, but it can also dry out essential surface moisture. Applying a high-quality leather conditioner replaces lost moisture and adds a sacrificial UV barrier.
- Apply a small amount of automotive leather conditioner onto a foam or microfiber applicator pad.
- Massage the conditioner evenly into the leather using overlapping circular motions.
- Let the conditioner absorb for 10 to 15 minutes.
- Buff the seats with a clean microfiber towel. Properly conditioned leather feels smooth and supple, featuring a natural matte finish—never greasy or shiny.
5 Critical Mistakes That Ruin Leather Car Seats
Avoiding common maintenance traps is just as important as using the right products.
┌───────────────────────────────────────────────────────────────────────────┐
│                    COMMON LEATHER DAMAGE RISKS                            │
├──────────────────────────┬───────────────────────┬────────────────────────┤
│ Mistake                  │ Why It Damages        │ Safe Alternative       │
├──────────────────────────┼───────────────────────┼────────────────────────┤
│ Using Magic Erasers      │ Acts like 3000-grit   │ Soft horsehair brush   │
│                          │ sandpaper; strips coat│ + pH-neutral cleaner   │
├──────────────────────────┼───────────────────────┼────────────────────────┤
│ Excessive Water/Moisture │ Soaks underlying foam;│ Light foam/vapor;      │
│                          │ causes water stains   │ wipe dry immediately   │
├──────────────────────────┼───────────────────────┼────────────────────────┤
│ Household Solvents       │ Ammonia/alcohol strips│ Dedicated pH-neutral   │
│ (Windex, Lysol)          │ clear topcoat         │ leather cleaner        │
├──────────────────────────┼───────────────────────┼────────────────────────┤
│ Leaving Seats Shiny      │ Shiny leather equals  │ Buff dry to achieve a  │
│                          │ heavy oil accumulation│ factory matte finish   │
├──────────────────────────┼───────────────────────┼────────────────────────┤
│ Sun Exposure While Wet   │ Direct sun heats wet  │ Clean in shade or an   │
│                          │ leather, causing shrink│ indoor garage          │
└──────────────────────────┴───────────────────────┴────────────────────────┘
1. Cleaning with Magic Erasers
Melamine foam (Magic Erasers) is an abrasive material that acts like ultra-fine sandpaper. While it removes grime quickly, it strips off the clear protective topcoat. Once this topcoat is gone, the raw dye underneath wears off rapidly, leaving bare, discolored patches.
2. Over-Saturating the Seats
Excessive liquid is a major enemy of interior upholstery. If cleaner or water drips into perforated holes or seams, it soaks into the polyurethane cushion foam beneath. This leads to foul mildew odors, water rings, and weakened seat stitching over time.
3. Using Harsh Household Chemicals
Products containing ammonia (like glass cleaners), isopropyl alcohol, bleach, or dish soap destroy leather finishes. Dish soap is designed to strip grease from cookware; on leather, it strips essential oils, leaving seats brittle and prone to cracking.
4. Mistaking Gloss for Cleanliness
Clean factory leather features a clean matte or satin finish. If your seats look shiny or slick, they are coated in built-up body oils, sweat, and dirt. Never use oil-heavy, glossy dressings that leave a slippery film, as these trap new dirt and stain clothing.
5. Cleaning in Direct Sunlight
Performing leather care under hot, direct sunlight causes liquid cleaners to dry rapidly before you can wipe them off. This leaves dried soap streaks and forces you to scrub harder, increasing the risk of surface marring. Always clean leather in a shaded area or garage.
DIY vs. Calling a Professional Detailer
While routine maintenance is easy to handle at home, some situations require specialized equipment and professional experience.
                  DECISION GUIDE: DIY VS. PRO
─────────────────────────────────────────────────────────────────────
HANDLE IT DIY IF:
• You are performing routine monthly or quarterly maintenance.
• The seats only have light surface dust, dirt, or minor spills.
• You want to apply a protective conditioner or maintenance spray.

CALL A PROFESSIONAL IF:
• The leather is severely dried, cracked, or showing faded dye.
• Ink, permanent marker, or harsh dye transfer (like blue jeans) exists.
• Mold or mildew has grown inside seat perforations.
• You want long-term protection like a Ceramic Coating for Leather.
─────────────────────────────────────────────────────────────────────
When to DIY
Regular maintenance—such as vacuuming crumbs, wiping down light dust, and applying quarterly conditioning treatments—is simple to do at home. Keeping a bottle of pH-neutral cleaner and soft microfiber towels in your garage makes routine maintenance quick and easy.
When to Call a Professional Detailer
Professional interior detailers use advanced tools that go beyond basic spray-and-wipe methods:
- Controlled Dry Steam Cleaning: Professionals use commercial vapor steam units operating at low moisture levels to lift ground-in dirt, kill 99.9% of bacteria, and open leather pores safely without soaking underlying seat foam.
- Blue Jean Dye & Ink Transfer Removal: Denim dyes transfer easily onto light-colored leather (tan, white, or grey). Removing deep dye transfer without stripping factory paint requires specialized solvents and delicate agitation techniques.
- Leather Restoration & Dye Touch-Ups: If your seat bolsters show cracking, color fading, or wear from entering and exiting the vehicle, professional detailers can repair, re-fill, and re-dye worn panels to restore a factory finish.
- Ceramic Coating for Leather: For long-term protection against UV damage, liquid stains, and dye transfer, professionals can apply a specialized leather ceramic coating. This breathable coating bonds to the topcoat, creating a hydrophobic layer that lasts 1 to 2 years.
Recommended Maintenance Schedule
Keeping leather car seats in pristine condition requires small, consistent habits rather than rare, aggressive cleanings.
┌───────────────────────────────────────────────────────────────────────────┐
│                      LEATHER CARE MAINTENANCE TIMELINE                    │
├───────────────────┬───────────────────────────────────────────────────────┤
│ Frequency         │ Action Items                                          │
├───────────────────┼───────────────────────────────────────────────────────┤
│ Weekly            │ Light vacuuming of seams and quick microfiber wipe    │
│                   │ with a dry cloth to clear loose dust.                 │
├───────────────────┼───────────────────────────────────────────────────────┤
│ Monthly           │ Gentle wipe-down using a pH-neutral leather cleaner   │
│                   │ to lift body oils and fresh dirt.                     │
├───────────────────┼───────────────────────────────────────────────────────┤
│ Every 3 Months    │ Deep clean followed by a high-grade leather           │
│                   │ conditioner or ceramic spray coat.                    │
├───────────────────┼───────────────────────────────────────────────────────┤
│ Annually          │ Professional interior detail with deep steam treatment│
│                   │ and long-term surface protection.                     │
└───────────────────┴───────────────────────────────────────────────────────┘
Final Thoughts: Protecting Your Investment
Your vehicle’s leather interior is a major investment that affects daily driving comfort and overall resale value.
By using pH-neutral automotive cleaners, soft horsehair brushes, and dry microfiber towels, you can safely remove dirt and body oils without damaging factory protective coatings. Avoid harsh household chemicals, keep moisture levels low, and finish with a quality conditioner to maintain a supple, matte finish year-round.
When dealing with tough dye transfer, deep cracking, or perforated mold, reach out to a professional detailer to restore your upholstery safely.